Have a Question?
Vendor/Supplier Overview
- Overview
- General Info
- Account
- Miscellaneous
- Messages
- Other Buttons
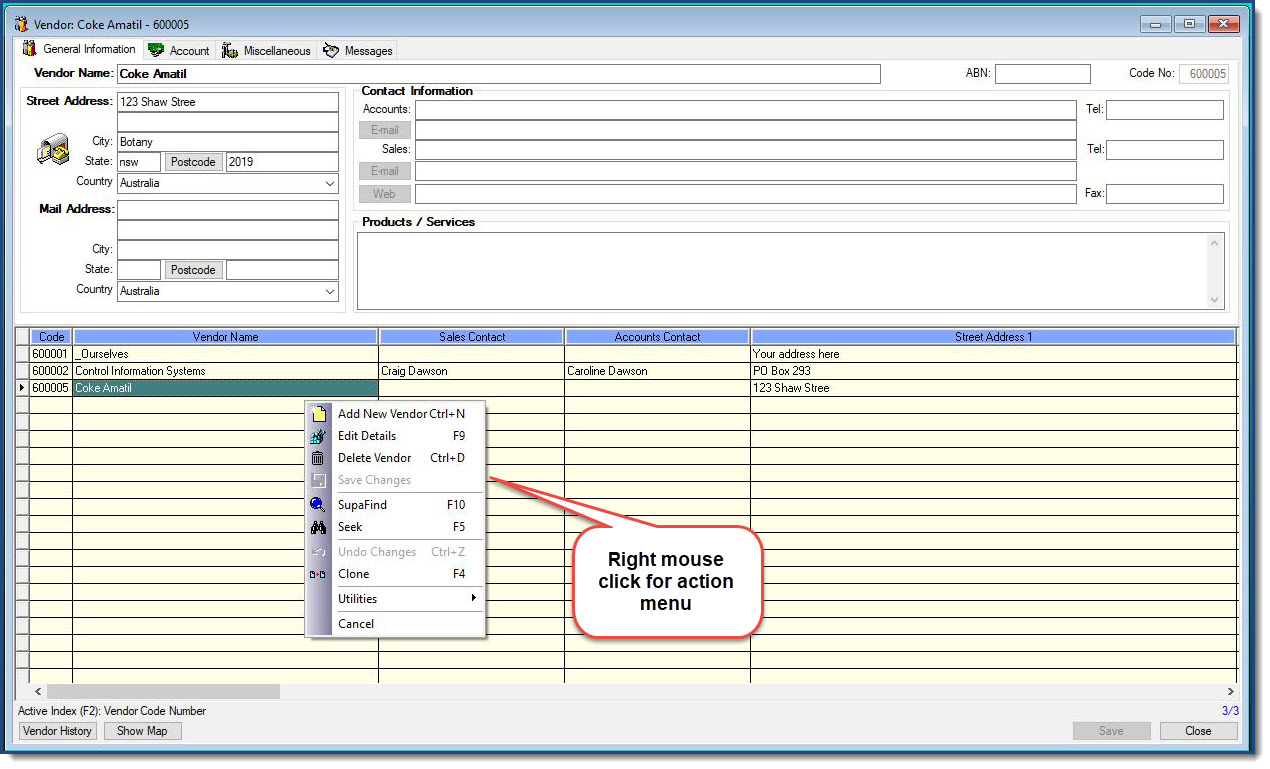
Vendors (Suppliers) can be added or edited at any time. The Vendors window provides an area where you can enter and set up your suppliers. This database is then used as a link with products that they supply, which in turn is used in many areas of the system.
The Vendors window has 4 Tab pages – General Information, Account, Miscellaneous & Messages.
From the system menu select File, Accounts Payable (A/P), Vendor Supplier Master. Alternatively, you can click the Vendors icon on the toolbar.
![]()
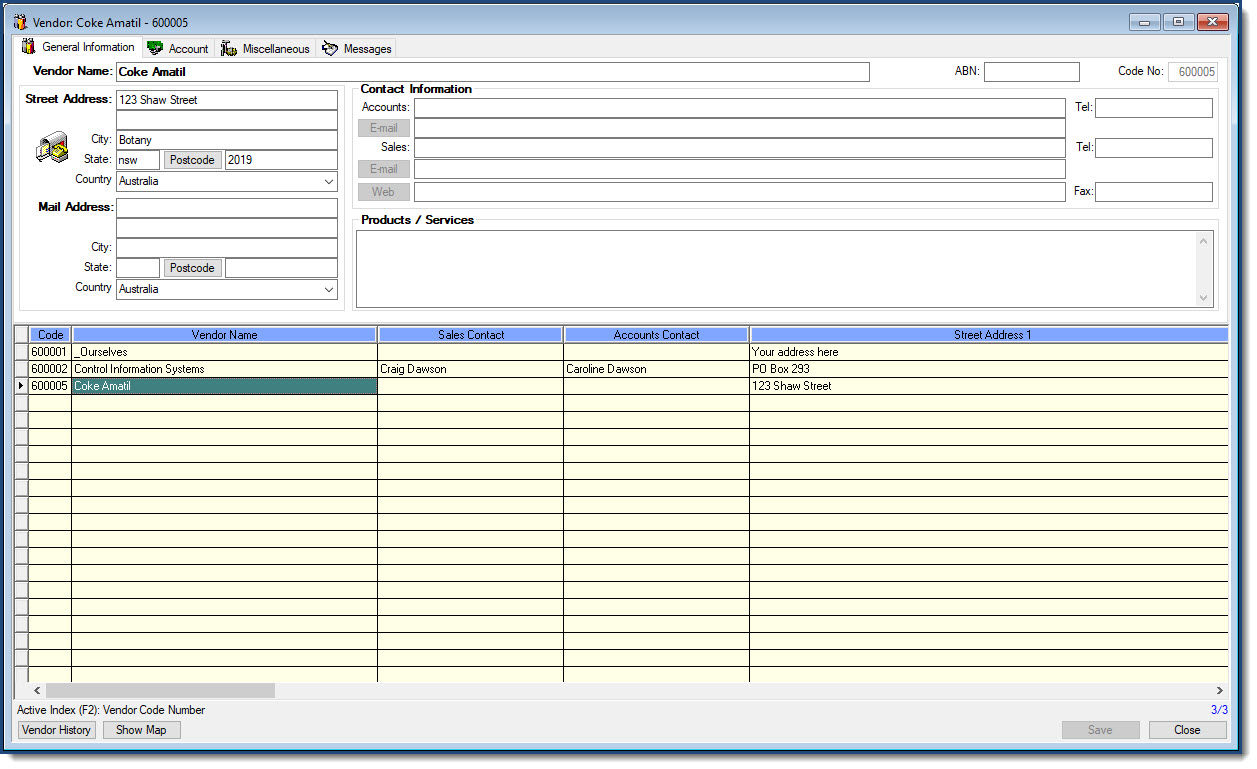
General Information
This tab displays the more commonly used fields for vendors and are described below.
- Vendor Name – This is the name of the actual Vendor. Can be their business or company name.
- ABN – Optional “Australian Business Number”. This field has automatic ABN validation to prevent the input of incorrect numbers.
- Code Number – A unique code number that they system will use to identify this vendor.
- Street Address – Enter this vendor’s actual street address.
- City – The City or Suburb of the address.
- State – The State of the address.
- Postcode – Enter the appropriate postal code.
- Country – Optional country field.
- Mail Address – Enter this vendor’s mailing address.
- City – The City or Suburb of the mail address.
- State – The State of the address.
- Postcode – Enter the appropriate postal code.
- Country – Optional country field.
- The Contact Information area is where you keep the names and details of the people that you speak to for this particular vendor.
- Accounts – Person’s name and telephone number to contact for Accounts information
- Sales – Person’s name and telephone number to contact for Sales information.
- Fax – This vendor’s facsimilie number
- Email – Their email address. (You can then also click the email button to send an email)
- Web – The vendor’s web site (clicking the Web button opens your web browser and takes you to their site)
- Terms – Your trading terms with this vendor.
You can enter a broad description of the types of products and services that this vendor supplies. This makes it easy when you want to find suppliers of certain products later by using the Supafind (F10) feature.
For example, if you had 100 different vendors in the system and wanted to find the ones that supplied “software”, you would simply press F10, type the word software, then press enter. The system would then locate all suppliers of software and show only them in the browser for you.
After any changes have been made, ensure that you click the “Save” button.
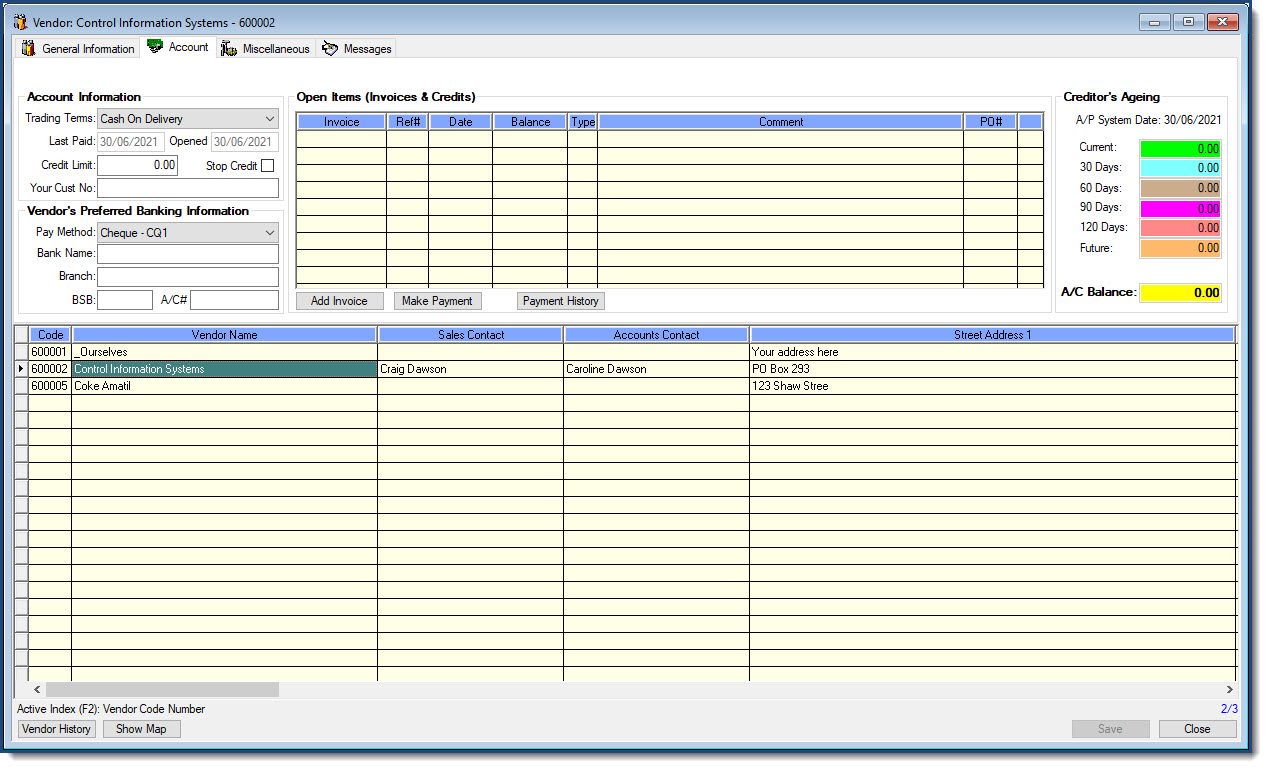
Account Information
- Trading Terms – these are the terms your supplier has granted you.
- Last Paid – Records the last time a payment was made from you, to this vendor.
- Account Opened On – Remembers when you first opened this account.
- Credit Limit – What is the maximum amount of credit you can use when purchasing from this vendor.
- Stop Credit – If you want to stop purchasing from this vendor, or if they put your account on hold, you can click this option which will also prevent accidental purchase orders being created.
- Your Cust No – this is your account number issued by your supplier.
Vendor’s Preferred Banking Information
- Pay Method – choose how you pay this vendor.
- Bank Name – vendor’s bank details
- Branch – vendor’s bank details
- BSB & A/C# – vendor’s bank BSB and account number
Open Items (Invoices & Credits)
Here you can add invoices, make payments and view payment history.
Creditor’s Ageing
This area shows the accounts payable system date, the account balance and ageing.
After any changes have been made, ensure that you click the “Save” button.
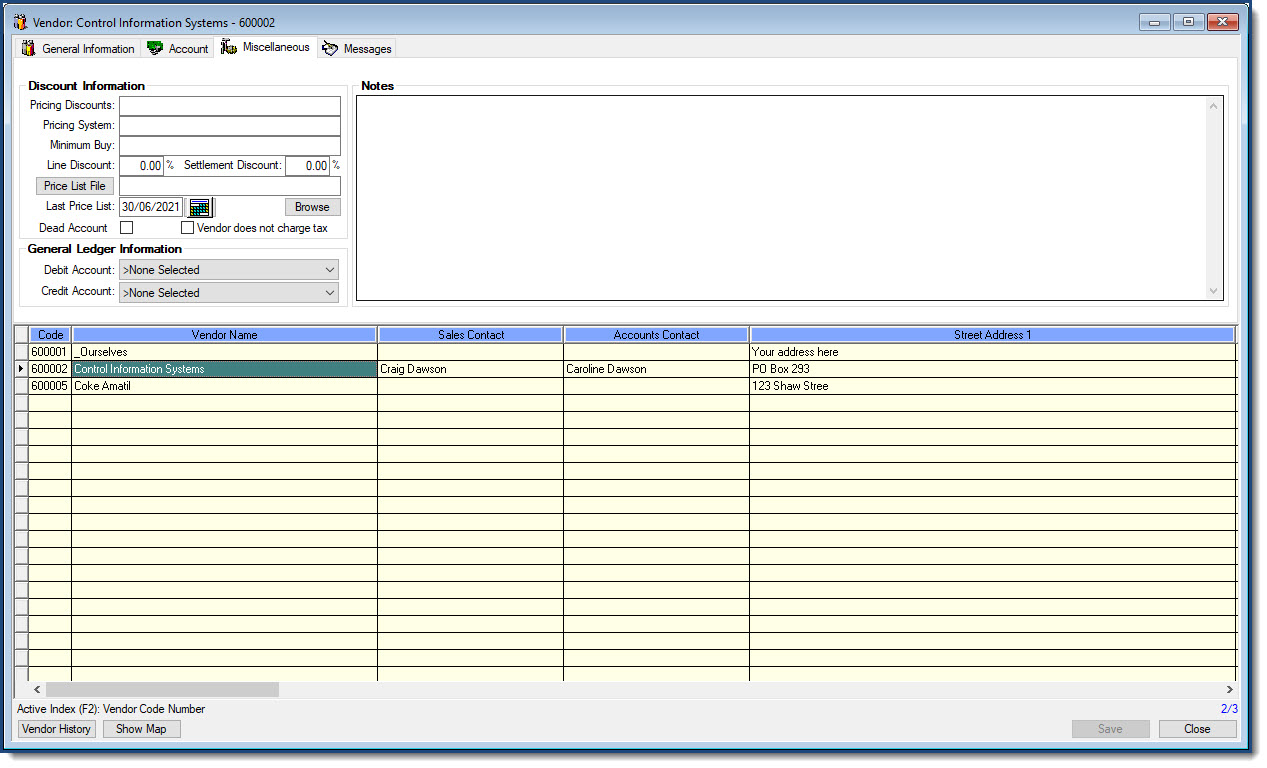
Discount Information
This tab provides an area to store miscellaneous details and any other notes you may wish to make.
- Pricing Discounts – Your standard discounts (if any) from this vendor
- Pricing System – What method you normally use to mark up on cost to calculate your selling price for items purchased from this vendor.
- Minimum Buy – If minimum buys are applicable, you can enter them here.
- Line Discount – Some vendors offer a line discount. If they do you can enter the normal rate here.
- Settlement Discount – If you are entitled to a settlement discount, this rate can be stored here.
- Price List File – You can save the filename of the vendors price list here. It can be any format that your system supports (Excel, Word, etc) To view the price list – click the button “Price List File”.
- Last Price List – The last time you received an updated price list from this vendor.
- Browse – Enables you to browse your system for the price list file instead of manually typing the file name.
- Dead Account – Flag if vendor is no longer used.
- The Notes area provides a place for you to put any vendor specific notes you may wish to make.
- After any changes have been made, ensure that you click the “Save” button.
Order Entry – set any message you desire in the field and it will be displayed or printed out for theis vendor.
After any changes have been made, ensure that you click the “Save” button.
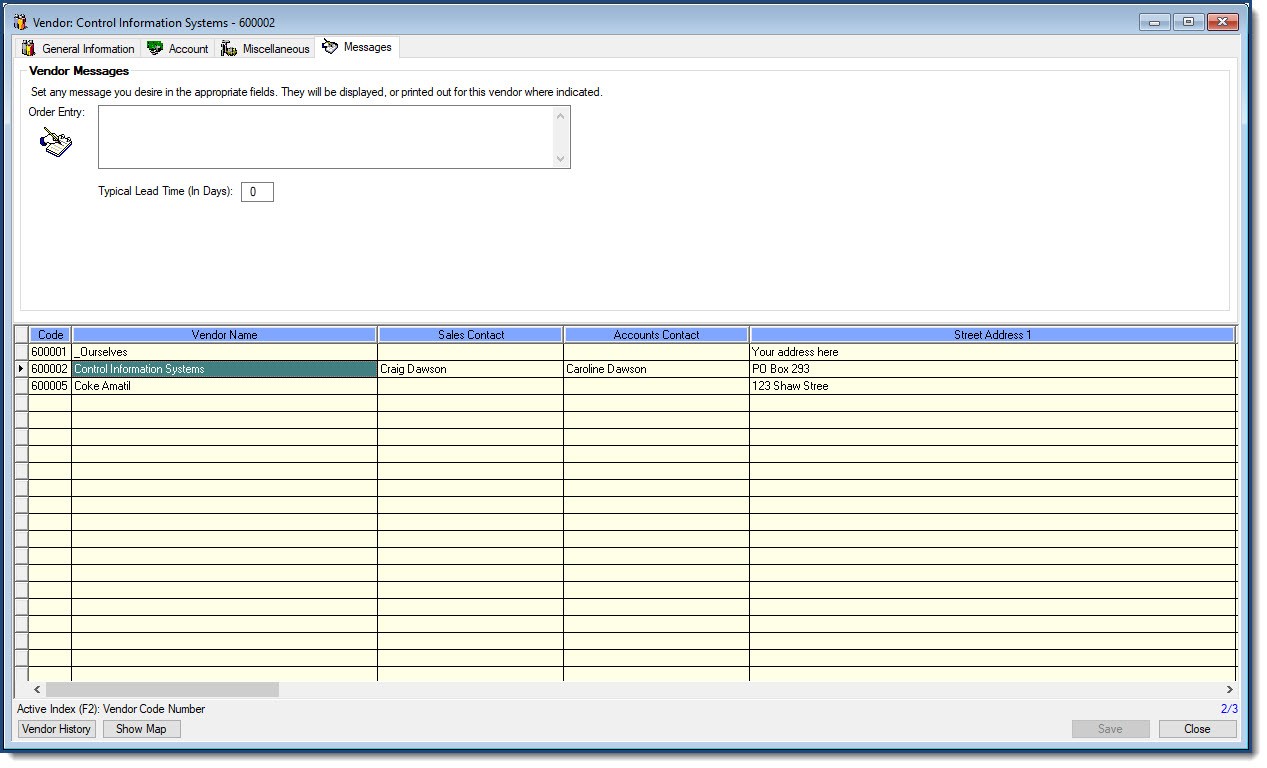
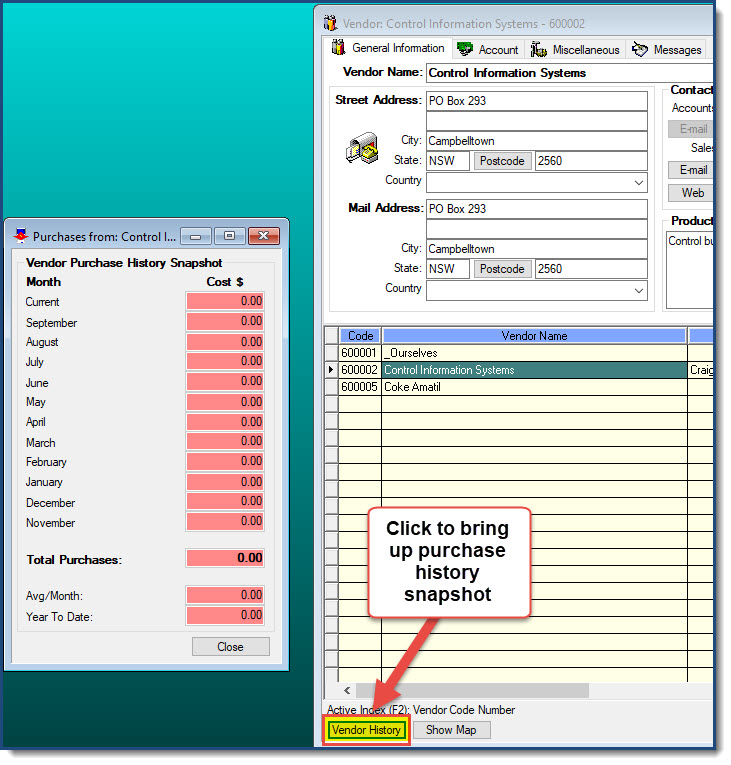
On the bottom of the Vender Module screen there are two buttons. First is Vendor History and the second is Show Map.
Vendor History will bring up a snapshot of the selected vendor purchase history.
The second button for Show Map will bring up Google Maps showing the address you have entered for the selected vendor.

